Configure OpenID connect identity providers
In alternative of the GitHub authentication flow, we support any OpenID compliant identity provider. The following are a few examples.
EGI Check-in
If you have an account for EGI check-in, you should be able to set it for authenticating the virtual kubelet with the interLink remote components with the following piece of configuration to be passed to the installation script.
oauth:
  provider: oidc
  issuer: https://aai.egi.eu/auth/realms/egi
  scopes:
    - "openid"
    - "email"
    - "offline_access"
    - "profile"
  audience: interlink
  grant_type: authorization_code
  group_claim: email
  group: "YOUR EMAIL HERE"
  token_url: "https://aai.egi.eu/auth/realms/egi/protocol/openid-connect/token"
  device_code_url: "https://aai.egi.eu/auth/realms/egi/protocol/openid-connect/auth/device"
  client_id: "oidc-agent"
  client_secret: ""
Remember to put your email in the group field!
Indigo IAM
If you have an account for Indigo IAM, you should be able to set it for authenticating the virtual kubelet with the interLink remote components. Follow those steps to setup a new client in the IAM portal and get the necessary information to fill the configuration. This guide is specific for the IAM portal https://iam.cloud.infn.it/ but it should be similar for other IAM portals that are OpenID compliant.
- Go to the IAM portal and log in.
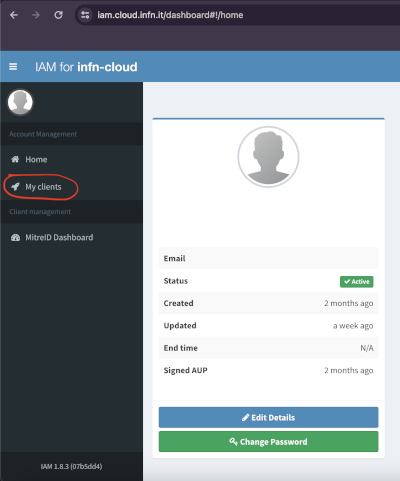
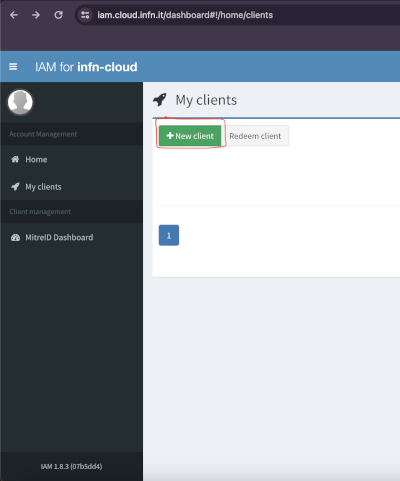
- After logging in, click on the
My clientstab on the left side of the page and then selectNew clientas shown in the images below.

 3. Set a name you prefer for the client.
4. Select the
 Scopes tab and add the following scopes: openid, email, offline_access, profile, wlcg, wlcg.groups.
5. Select the Grant types tab and add the following grant types: authorization_code, client_credentials,
refresh_token, urn:ietf:params:oauth:grant-type:device_code.
6. Save the client by pressing the Save client button.
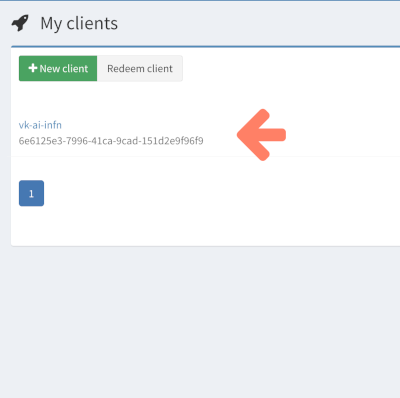
After creating the client, you will be able to see the new client in the My clients page as show in the image below.

You can click on the client to see the client details.
You will find the Client id under the Main tab and the Client secret under the Credentials tab.
Now, with those information, you can fill this piece of configuration to be passed to the installation script.
oauth:
    provider: oidc
    issuer: "https://iam.cloud.infn.it/"
    scopes:
      - "openid"
      - "email"
      - "offline_access"
      - "profile"
    audience: users
    grant_type: authorization_code
    group_claim: email
    group: "YOUR EMAIL HERE"
    token_url: "https://iam.cloud.infn.it/token"
    device_code_url: "https://iam.cloud.infn.it/devicecode"
    client_id: "YOUR CLIENT ID HERE"
    client_secret: "YOUR CLIENT SECRET HERE"